Innovative Solutions
for Your Toughest Manufacturing Challenges
When you need quality aircraft sheet metal parts and assemblies, count on Capps Manufacturing in Wichita, Kansas. Business and commercial aircraft customers around the world count on us for skilled aircraft sheet metal fabrication and forming. We specialize in sheet metal forming for business, commercial and military aircraft. Since 1983, we’ve served the aerospace industry with resourceful, disciplined and flexible sheet metal fabrication services.


1. Initial Cleaning
The first step is to clean the surface of the material in question – in this case, sheet metal. This ensures that the surface is free of contaminants like dirt, paint, oil or scale that can hide actual surface defects. Sandblasting or chemicals are used to remove impurities so the dye can seep into real cracks. Even aircraft parts that have already been DPI tested need cleaning to remove the dye from previous testing. This cleaning step is critical to prepare the surface to receive the dye. Skipping cleaning risks missing defects, leading to lost time and money for reworking, overprocessing, or even scrapping a finished part at final inspection.
2. Penetrant Application
After the part’s surface has been cleaned, the fluorescent penetrant is applied to the surface. If there are any cracks, flaws or other defects in the sheet metal, the dye will slowly seep into them. Soaking time depends on the size of the flaws or cracks, but it’s usually around 30 minutes. It takes longer for the dye to penetrate smaller flaws but it soaks into large defects quickly.
3. Excess Dye Removal
After the dye has had time to soak into any defects in the sheet metal, the next step is to remove the extra dye on the outer surface. This is a highly controlled process because it’s important to only remove excess dye from the surface of the part and not from any identified flaws. Typically, a cleaner is applied to a clos and the surface is carefully wiped down. The specific chemical used depends on the penetrant type.
4. Developer Application
After cleaning off excess dye, a contrasting developer is applied. This developer makes flaws easy to see and also pulls penetrant up out of deeper cracks. After the developer is given time to work, inspectors will be able to easily detect defects in the part.
5. Inspection
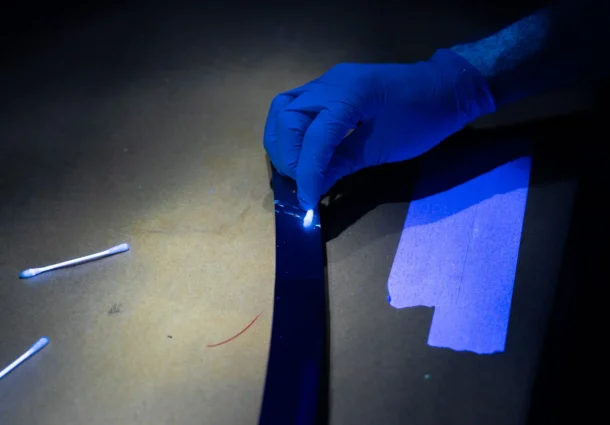
In the case of fluorescent inspection, the inspector shines a special ultraviolet (UV) light on the part in a dark room. This ensures there will be good contrast between the glow of the penetrant in the defective areas and the darkness of the rest of the part. The inspector carefully examines all surfaces and records any areas of concern so they can be seen later without UV lighting. Timing of the inspection is critical: if the part is inspected too soon after the developer is applied, flaws may not show up; too late, and the “glow” in defects can become blotted and difficult to see.
6. Final Cleaning
After the part has been through a successful dye penetration inspection, it receives a final cleaning. Then, it’s off to its next stop: getting shipped, moved on to another process, or if it’s defective it may be reworked or scrapped. However, sometimes fixing a flawed part isn’t cost effective, so it may just skip the cleaning step altogether.


